Setup Validator
Part 1 - Setup server components
Requirements
The most common way for a beginner to run a validator is on a cloud server running Linux. You may choose whatever VPS providers that your prefer, and whatever operating system you are comfortable with.
The transactions weights in Galital Testnet were benchmarked on standard hardware. It is recommended that validators run at least the standard hardware in order to ensure they are able to process all blocks in time. The following are not minimum requirements but if you decide to run with less than this beware that you might have performance issue.
Minimum Hardware :
- 6GB ram, 60 GB Storage, 2 CPU , stable server uplink connection with fixed IP
Ideal Hardware :
- 60GB ram, 300 GB Storage, 6 CPU, stable server uplink connection with fixed IP
Using Ubuntu 20.04 :
Update your Ubuntu
sudo apt-get update
Validator
Install & Configure Network Time Protocol (NTP) Client NTP is a networking protocol designed to synchronize the clocks of computers over a network. NTP allows you to synchronize the clocks of all the systems within the network. Currently it is required that validators' local clocks stay reasonably in sync, so you should be running NTP or a similar service. You can check whether you have the NTP client by running:
If you are using Ubuntu 18.04 / 19.04 / 20.04, NTP Client should be installed by default.
timedatectl
If NTP is installed and running, you should see System clock synchronized: yes (or a similar message). If you do not see it, you can install it by executing:
sudo apt-get install ntp
ntpd will be started automatically after install. You can query ntpd for status information to verify that everything is working:
sudo ntpq -p
WARNING: Skipping this can result in the validator node missing block authorship opportunities. If the clock is out of sync (even by a small amount), the blocks the validator produces may not get accepted by the network. This will result in ImOnline heartbeats making it on chain, but zero allocated blocks making it on chain.
Installing the Galital Testnet Binary
Install and enable Chrony
Chrony is time synchronization service. It will keep time on server in sync, which is crucial for validator to operate without interruption.
sudo apt install chrony
sudo systemctl enable chrony
Firewall configuration
Configure firewall ports to allow SSH and Validator service to communicate.
sudo ufw allow 22
sudo ufw allow 30333
sudo ufw enable
Setup fail2ban
It provides basic-level protection against distributed brute-force attacks.
sudo apt install -y fail2ban && sudo systemctl enable fail2ban && sudo service fail2ban start
Install Galital Validator binaries
wget https://github.com/starkleytech/galital/releases/download/2.0.1/galital && sudo chmod +x ./galital && sudo mv ./galital /usr/bin/galital
Create user account to run Validator
It is recommended to run validator as non-root user. For that create dedicated user account which will be used to run validator.
sudo adduser galital
when adding user you will be asked to provide password and some additional details for the account. Only password is mandatory, other parameters can be left blank.
Create Galital Validator service
Create service file file in /lib/systemd/system/tal.service
sudo nano /lib/systemd/system/galital.service
Content of galital.service file (make sure to change "A Node Name" and replace it with your moniker):
[Unit]
Description=Galital Validator
After=network-online.target

[Service]
ExecStart=/usr/bin/galital --port "30333" --name "A Node Name" --validator --chain galital
User=galital
Restart=always
ExecStartPre=/bin/sleep 5
RestartSec=30s
LimitNOFILE=8192

[Install]
WantedBy=multi-user.target
If you need to change port, you can setup with
--prometheus-port--rpc-portand--ws-port
then start the service
sudo systemctl enable galital && sudo service galital start
Check if validator is started
To ensure that Galital Validator process works:
ps aux | grep galital
You should see similar output:
galital 8108 9.9 21.0 1117976 419772 ? Ssl May17 601:17 /usr/bin/galital --port 30333 --name "A Node Name" --validator --chain galital
Check if your node is appearing in the telemetry UI : https://telemetry.polkadot.io/#list/Galital
Do not forget to change the name parameter (--name "A Node Name")
Video demonstrating all above steps:
Part 2 - Assign the node to an account
You can get some RTAL (Testnet token) with the discord bot
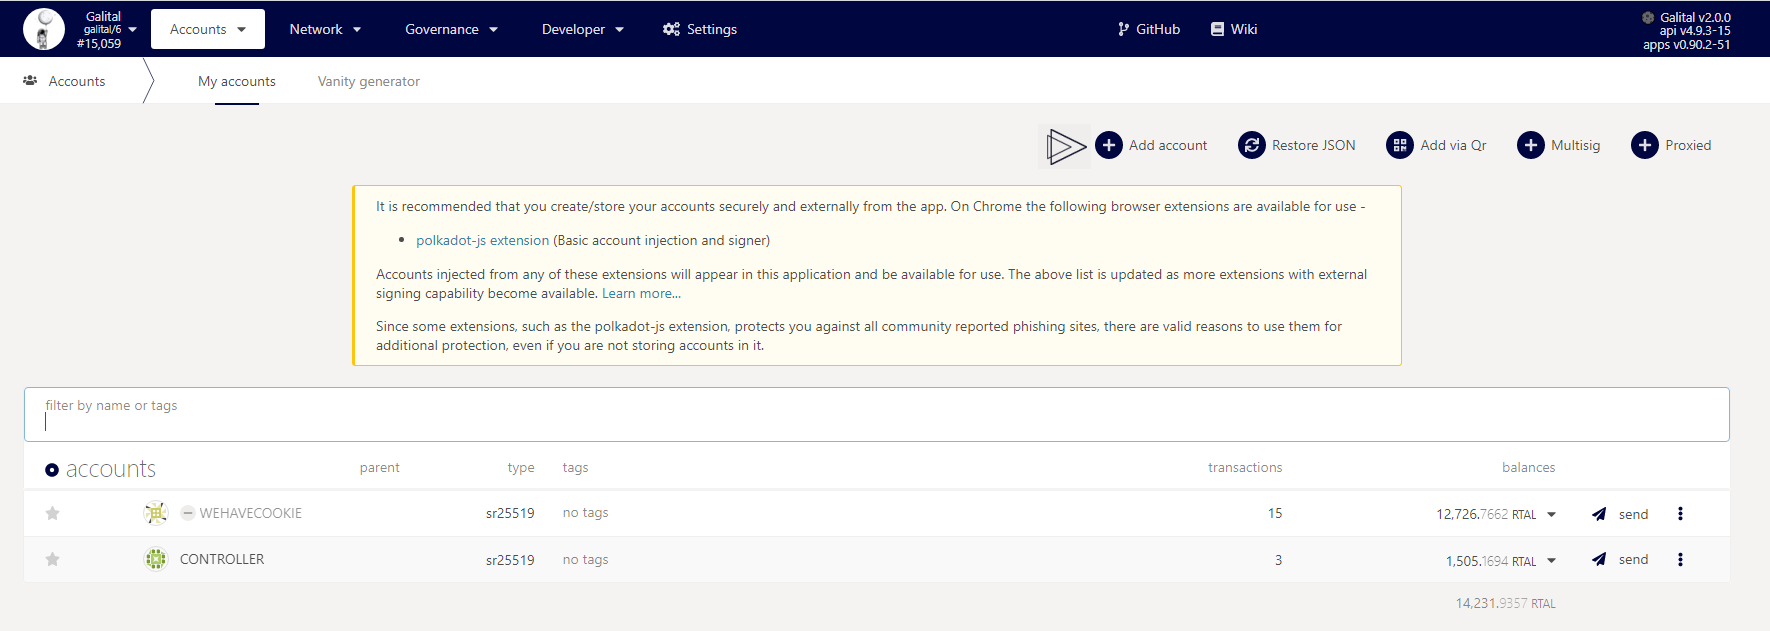
You need to create an controller account in order to do the next steps.
The stash account serve as you "cold wallet" with all your precious coin
The controller account serve as a manager to your stash account
Always keep in safe place your keystore file or your 12/24 words seed
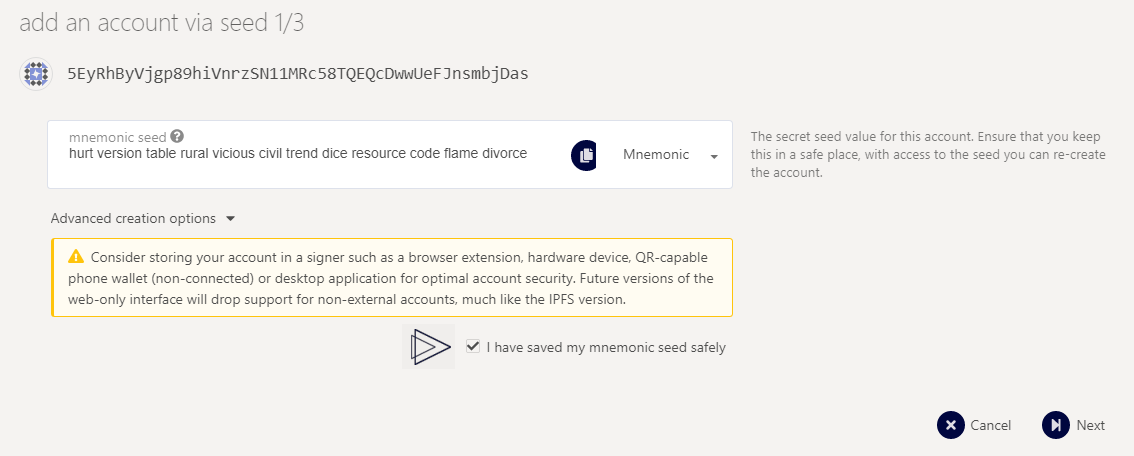
To create an controller account, add account
Save your mnemonic seed
then name your account and add a password
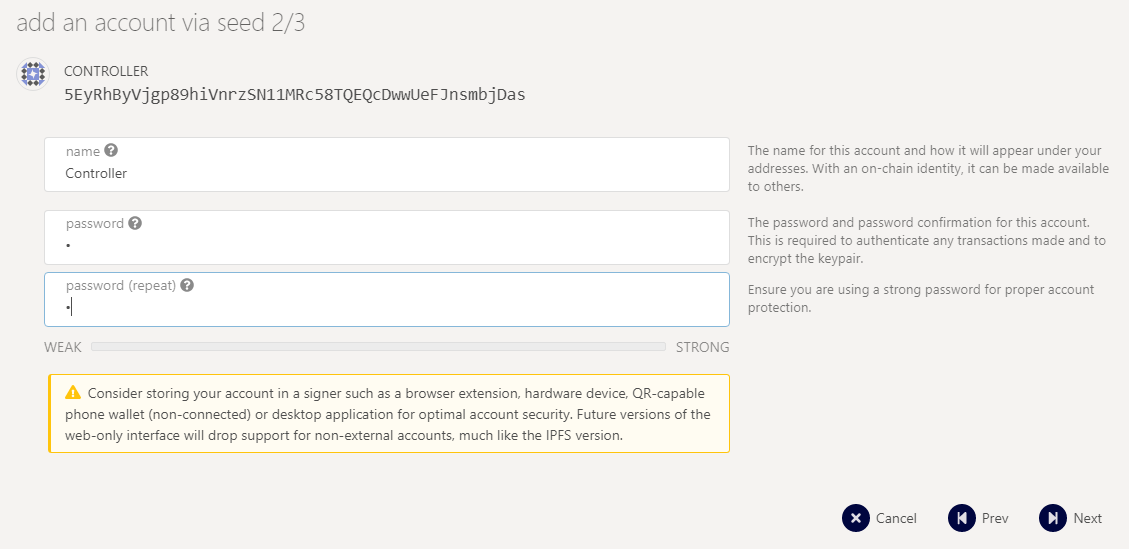
Then send some $RTAL (from your stash account) for covering network fees
You can proceed to the next steps
Create session key:
Go in you terminal where the node is installed and paste the current command, you will have a session key of your node.
curl -H "Content-Type: application/json" -d '{"id":1, "jsonrpc":"2.0", "method": "author_rotateKeys", "params":[]}' http://localhost:9933
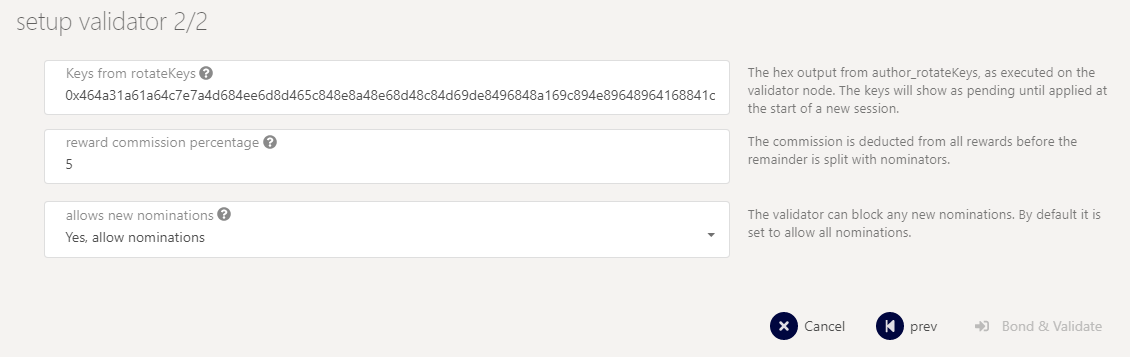
Submitting the setKeys Transaction:
Go to the testnet you can now create a validator, use the key generated above to paste in the form.
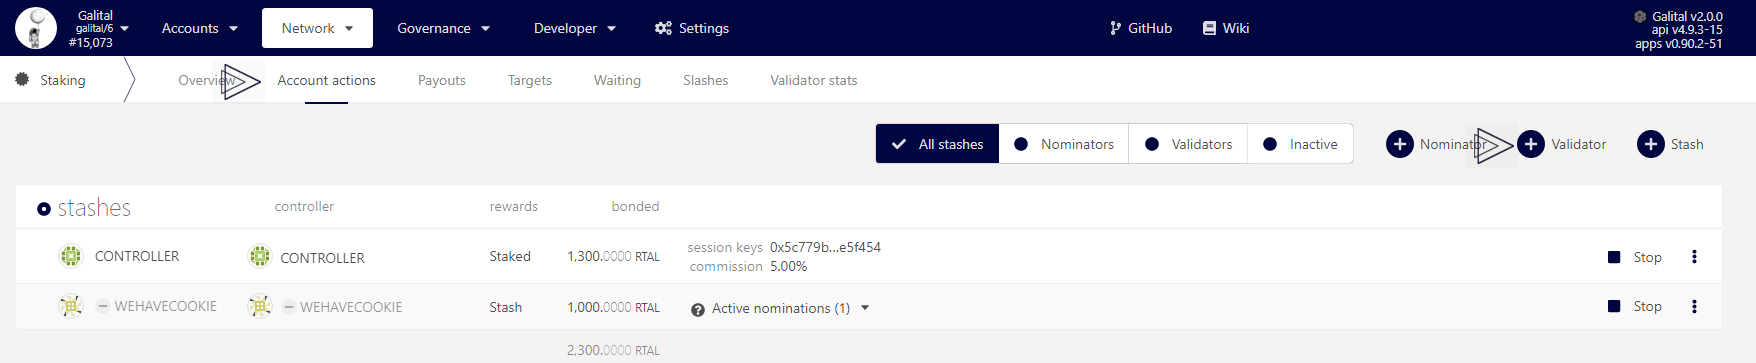
Select your stash account, controller account and so one
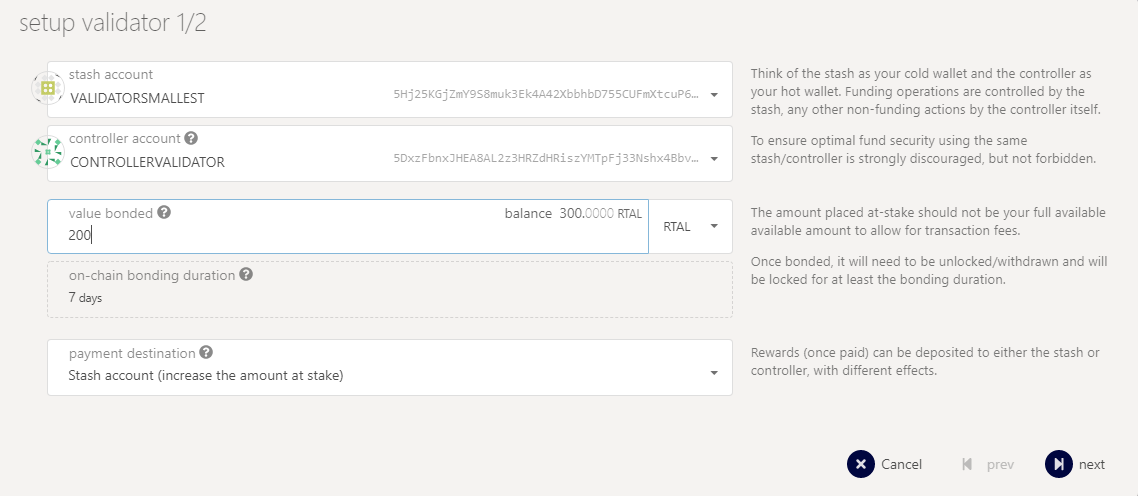
Add you keys form the past command.
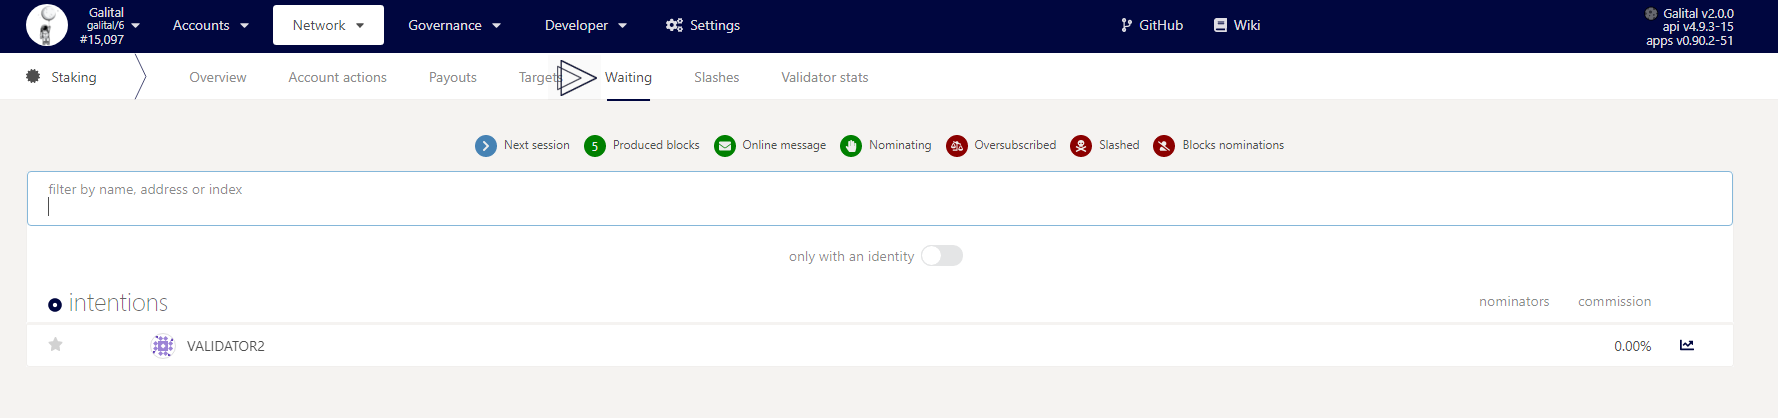
You should now see your validator in the waiting tab
Video demonstrating all above steps:
Part 3 - Set on-chain name of the validator
Short video guide demonstrating how to assign name to validator.
Voila, you are all set
Written by Masterdubs & WeHaveCookie